Showing posts with label howto. Show all posts

Saturday, December 6, 2008

Confidence boost from Linksys

I recently upgraded the firmware on my Linksys WRT54G router to this version. I include the preview because I love this icon. So sleek and mysterious.


Well actually, first I downloaded the prominently displayed firmware upgrade. It turned out to be for a later version of the router, so I got this excellent message. It's more than an error message. It's a slap in the face. It's a raging, hopeless slogan for scrawling above the door of a bombed out hospital, perhaps. Continue.


No problem, really. It isn't as dire as it sounds. "Please check the bottom of your router to make sure you have the correct version," says the guide. Just dig a little bit on the Cisco site and find the firmware for your router version. It's in Home >> Support >> Technical Support >> Downloads.

Ah, that's better! Your reward is this sunny fanfare for the credulous.

Sleep soundly. Cisco is looking after the details.

Saturday, November 15, 2008

Using "Create Event" action in Gmail

I am a fan of the integration of Gmail and Google Calendar, but one thing that isn't clearly explained is that you need to put event details in the subject line of your email. Even then the results can be unexpected. I did some light testing of various date strings. Here are some results.

Today is Sunday the 16th of November 2008. You have just learned of a screening of the film "Foo" in the evening and want to forward it to Eddy. Here are a few Subject: lines and their results.

Success
Subject: Foo Screening at 7pm
Subject: Foo Screening: Sunday Nov. 16 - 7pm
A Week Late
Foo Screening: Sunday at 7pm


Month Long Event
Foo Screening - Sunday, November 16 - 7:00pm
Watch out for hyphens in your date. In this case they indicate a date range. Google Calendar appears to have a default of one month for an unfinished date range. The end date is set to December 15 2008.


No Event Detected
Subject: Foo Screening - Sunday, November 16 - 7:00


Monday, October 1, 2007

Unbreakable Links in Mail.app

Your GMail friends hate the links in your email messages because they appear to be broken. It isn't your fault. It is just that you use Apple Mail. Many simple fixes for this behaviour have been proposed, such as surrounding your link with "< >". Only a few actually work. In future other email readers will handle links the way Apple does, or perhaps Apple will add a preference setting to let users opt for old-fashioned handling of text. In the meantime, Apple Mail users can do this:

1. Use Rich Text as your setting for composing mail.


2. Copy your URL link.

3. Type a short phrase describing the location.

4. Select the phrase and right click it (Control-Click) to get the contextual menu. You can also use "Add Hyperlink ..." from the "Edit" menu.

5. Select "Edit Link..." and paste your URL.

Thanks to Hawk Wings for the analysis and solution.

Wednesday, September 12, 2007

Manual upload to picasaweb

Picasaweb is a great service, but its uploading tools require MacOSX 10.4. I have been coaching my mother to get photos of her paintings on her picasaweb site. She runs MacOSX 10.3 on her G4 laptop. There is no documentation on manual uploading of photos to picasaweb from iPhoto.

Here is a procedure for exporting an album of photos from iPhoto. It is not very fun, but it should work for everyone.
1. In iPhoto create an album of photos you want to have on your Picasa web site
2. select the album and do File>Export ... from the menu.
3. select "File Export" from the tabs in the dialog that appears


4. create a new Folder to hold the exported photos. (I like to put it on the Desktop in a folder named after the album name). Select "Desktop" and click the "New Folder" button. When you are done, go ahead and export the photos.


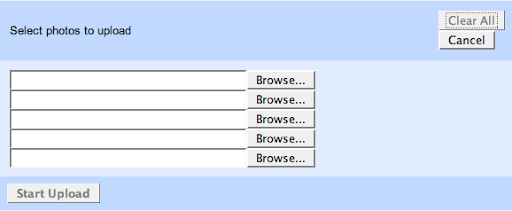
5. In Safari, go to your picasaweb account and log in. Create a new album and name it. The other options can be edited later. Click the "Upload Photos" button. The file upload form allows you to upload 5 files at a time. Tedious. Click one of the Browse buttons, and a file selector window will open. Find your new album folder on your Desktop, and select a photo file in it. Repeat with four more if you want. Click "Start Upload".


This will take a while to save. When it is done you should be redirected to your new album with uploaded photos displayed in thumbnail. You can upload more photos to an existing album. There is a link to do so on the left hand side.